The trumpet is one of music's most expressive and direct instruments, capable of brilliant projection and lyrical warmth. Mastering trumpet fingerings requires understanding the instrument's unique characteristics—its conical bore, three-valve mechanism, and harmonic series create distinct challenges that set it apart from other brass instruments. This comprehensive guide provides everything you need to develop reliable tone, accurate pitch, and clean valve coordination, from fundamental setup to advanced techniques.
Whether you're a complete beginner learning your first notes or an experienced player refining your technique, this guide offers trumpet-specific methods rather than generic brass advice. You'll learn how to align airflow, embouchure firmness, and valve timing so that sound starts are consistent and centered, building musical confidence from the ground up.
Why Trumpet Fingerings Are Unique
The trumpet presents distinctive challenges that set it apart from other brass instruments. Its conical bore, three-valve system, and harmonic series require specialized fingerings and techniques that are essential for professional trumpet performance.
Trumpet-Specific Characteristics
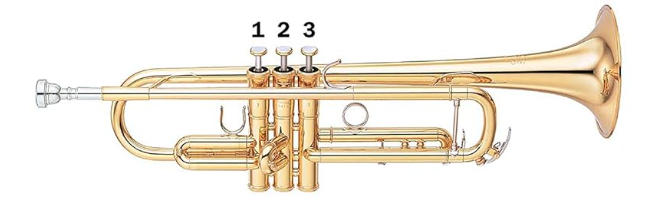
- Three-Valve System: Only three valves control all chromatic notes
- Conical Bore: Creates unique acoustic properties affecting valve combinations
- Harmonic Series: Multiple notes possible with same fingering
- Embouchure Control: Different embouchure needed for each harmonic
- Transposing Instrument: B♭ trumpet sounds a whole step lower than written
These unique characteristics mean that trumpet fingerings must be executed with careful attention to valve combinations and harmonic series. The trumpet's three-valve system creates distinct fingering patterns that must be mastered separately.
Trumpet Essential Foundations: Posture, Embouchure, and Breath
Before mastering fingerings, you must establish proper fundamentals. These foundational elements directly impact your ability to execute valve combinations accurately and produce consistent tone quality.
Posture and Instrument Setup
Proper trumpet holding technique is fundamental to successful playing. Correct posture and hand positioning directly impact valve control, embouchure stability, breath support, and overall endurance.
Trumpet Body Posture
- Standing Position: Feet shoulder-width apart, weight evenly distributed. Keep spine straight but relaxed.
- Seated Position: Sit on the front half of your chair, feet flat on the floor. Maintain neutral spine alignment.
- Shoulder Position: Shoulders relaxed and level, not raised. This allows for natural breathing and reduces tension.
- Head Position: Head balanced naturally, chin slightly tucked. Align the mouthpiece with the natural head position to reduce jaw strain.
- Elbow Position: Elbows slightly away from body for comfort and freedom of movement.
- Ribcage Expansion: Imagine the ribcage expanding 360° to support air naturally.
Trumpet Instrument Position
- Horizontal Alignment: Trumpet should be parallel to the floor, with slight downward angle (about 10-15 degrees).
- Mouthpiece Position: Center the mouthpiece on your lips for optimal embouchure formation.
- Bell Direction: Pointed slightly forward and away from your body. Bell slightly forward; music stand at eye level to avoid neck tilt.
- Distance from Body: Close enough for comfortable hand position, allowing natural arm positioning.
Right Hand Position and Technique
The right hand controls the three piston valves and provides primary support for the instrument.
- Thumb Position: Place between the first and second valve casings for support and balance.
- Index Finger: Position on the first valve (closest to mouthpiece), using fingertip not finger pad.
- Middle Finger: Place on the second valve (middle valve), maintaining natural finger curve.
- Ring Finger: Position on the third valve (furthest from mouthpiece), with relaxed curvature.
- Pinky Finger: Rest lightly on the pinky hook without pressing down or gripping. Keep pinky floating above the hook to avoid tension and pitch rise.
- Valve Technique: Press valves straight down with fingertips, not finger pads. Maintain natural finger curve for efficient valve operation. Keep hand relaxed to prevent tension and fatigue.
Left Hand Position and Technique
The left hand provides additional support and controls tuning adjustments.
- Thumb Position: Place in the first valve tuning slide ring for fine-tuning adjustments.
- Index Finger: Wrap around the leadpipe for support, using valve block for stability.
- Middle Finger: Position alongside the index finger for additional stability.
- Support Function: Primary role is to support and stabilize the instrument. Stabilize the horn with the left hand so the right hand can move freely and quietly.
- Relaxed Grip: Hold instrument gently without excessive pressure. Keep fingers relaxed and independent.
- Weight Distribution: Help distribute instrument weight evenly between both hands.
Trumpet Common Holding Mistakes to Avoid
- Gripping Too Tightly: Holding the trumpet with excessive tension causes fatigue and restricts valve movement. Practice holding with minimal pressure.
- Incorrect Valve Finger Position: Fingers not properly centered on valve caps. Ensure each finger is centered with proper curvature.
- Poor Posture: Slouching or leaning while playing. Maintain straight spine and relaxed shoulders throughout playing.
- Excessive Mouthpiece Pressure: Pressing mouthpiece too hard against lips. Use minimal pressure, allowing lips to vibrate freely.
- Incorrect Pinky Hook Usage: Gripping or pressing down on pinky hook causes tension and pitch rise. Rest pinky lightly without applying pressure.
Trumpet Embouchure Formation
- Mouthpiece Placement: Center the mouthpiece; use firm corners and a small, flexible aperture. Aim for an even buzz feeling—no localized pressure points.
- Air and Tongue Coordination: Air first, then tongue—start notes with a gentle tu/du; avoid pinching. The tongue merely shapes the attack; the air generates the tone.
- Breath Support: Support from the torso; keep throat open for a resonant core sound. Think warm air on low notes and faster air on ascending intervals to keep pitch stable.
Understanding How Valves Change Pitch
Pressing valves routes air through extra tubing, lengthening the instrument and lowering pitch in precise steps. Each valve combination adds a specific length of tubing:
- Valve 1: Lowers pitch by a whole step (2 semitones)
- Valve 2: Lowers pitch by a half step (1 semitone)
- Valve 3: Lowers pitch by one and a half steps (3 semitones)
- Combined Valves: The lengths add together, creating all chromatic intervals
Learn the basic combinations (1, 2, 3 and their mixes), then train the ear to match the instrument's natural tendency in each register. Prioritize clean valve alignment—lift and place with minimal lateral motion—to reduce smears between slots.
Complete Trumpet Fingering Chart by Register
For an interactive experience with our detailed fingering charts, visit our Interactive Trumpet Fingering Chart page.
Low Register (F#3 to B♭4) - The Foundation
The trumpet's low register is characterized by its rich, warm tone quality. These notes require substantial breath support and a relaxed embouchure. This register forms the foundation of trumpet playing and is essential for developing proper technique.
| Note | Fingering | Valve Combination | Tips |
|---|---|---|---|
| F#3 | 1+2+3 | All valves down | Lowest note |
| G3 | 1+2 | Valves 1+2 | Use valves 1+2 |
| G#3 | 2+3 | Valves 2+3 | Use valves 2+3 |
| A3 | 1+3 | Valves 1+3 | Use valves 1+3 |
| A#3 | 2 | Valve 2 only | Use valve 2 |
| B3 | 1 | Valve 1 only | Use valve 1 |
| C4 | Open | No valves | Fundamental note |
| C#4 | 3 | Valve 3 only | Use valve 3 |
| D4 | 1+2 | Valves 1+2 | Use valves 1+2 |
| D#4 | 2+3 | Valves 2+3 | Use valves 2+3 |
| E4 | 1+3 | Valves 1+3 | Use valves 1+3 |
| F4 | 2 | Valve 2 only | Use valve 2 |
| F#4 | 1 | Valve 1 only | Use valve 1 |
| G4 | Open | No valves | Fundamental note |
| G#4 | 3 | Valve 3 only | Use valve 3 |
| A4 | 1+2 | Valves 1+2 | Use valves 1+2 |
| A#4 | 2+3 | Valves 2+3 | Use valves 2+3 |
| B♭4 | 1+3 | Valves 1+3 | Use valves 1+3 |
Middle Register (B4 to F5) - The Sweet Spot
This register is where the trumpet truly shines. Most orchestral trumpet parts are written in this register, and it's where the instrument produces its most characteristic sound. However, even these "comfortable" notes require careful attention to embouchure and breath support.
| Note | Fingering | Valve Combination | Alternate |
|---|---|---|---|
| B4 | 2 | Valve 2 only | - |
| C5 | Open | No valves | - |
| C#5 | 3 | Valve 3 only | - |
| D5 | 1+2 | Valves 1+2 | - |
| D#5 | 2+3 | Valves 2+3 | - |
| E5 | 1+3 | Valves 1+3 | - |
| F5 | 2 | Valve 2 only | - |
High Register (F#5 to C6+) - The Advanced Zone
This register requires advanced techniques and specialized embouchure control. These notes are extremely challenging and require exceptional breath support, precise embouchure, and advanced valve technique. Only experienced players should attempt these notes.
| Note | Fingering | Valve Combination | Technique |
|---|---|---|---|
| F#5 | 1 | Valve 1 only | Advanced embouchure |
| G5 | Open | No valves | Precise control |
| G#5 | 3 | Valve 3 only | Focused air stream |
| A5 | 1+2 | Valves 1+2 | Strong support |
| A#5 | 2+3 | Valves 2+3 | Controlled pressure |
| B5 | 1+3 | Valves 1+3 | Precise embouchure |
| C6 | 2 | Valve 2 only | Advanced technique |
| C#6 | Open | No valves | Expert level |
| D6 | 3 | Valve 3 only | Professional level |
| D#6 | 1+2 | Valves 1+2 | Master level |
| E6 | 2+3 | Valves 2+3 | Elite level |
| F6 | 1+3 | Valves 1+3 | Virtuoso level |
Trumpet's Unique Harmonic Characteristics
The trumpet's harmonic series is fundamentally different from other brass instruments due to its conical bore and three-valve system. Understanding these differences is crucial for controlling intonation and producing the characteristic trumpet sound.
Why Trumpet Harmonics Are Different
- Conical Bore: Creates more pronounced harmonic differences
- Three-Valve System: Makes overtones more audible and problematic
- Embouchure Sensitivity: Tiny changes in embouchure dramatically affect harmonic content
- Intonation Challenges: Harmonics can interfere with accurate pitch production
- Valve Combinations: Different valve combinations affect harmonic content
Harmonic Series for Open Fingering (C4)
- 1st Harmonic: C4 - fundamental, requires relaxed embouchure
- 2nd Harmonic: C5 - octave, often sharp without proper control
- 3rd Harmonic: G5 - perfect fifth, can be unstable
- 4th Harmonic: C6 - two octaves, extremely challenging
- 5th Harmonic: E6 - major third, professional level only
- 6th Harmonic: G6 - perfect fifth, virtuoso territory
- 7th Harmonic: B♭6 - minor seventh, rarely used
- 8th Harmonic: C7 - three octaves, extreme technique required
Advanced Trumpet Fingering Techniques
Alternate Trumpet Fingerings
Many notes can be played with different fingerings, each offering unique advantages for specific musical contexts:
High C (C6) - Multiple Options
- Standard: Valve 2 only, requires focused embouchure
- Alternate: Open fingering with different embouchure
- Forked: Alternative for certain passages
High D (D6) - Flexibility Options
- Standard: Valve 3 only
- Alternate: Alternative for certain passages
- Forked: Useful in rapid sequences
Valve Technique
Many notes require specialized valve techniques for smooth execution:
Common Valve Techniques
- C to D valve change: Use smooth valve transitions
- D to E valve change: Use coordinated valve movements
- F to G valve change: Use precise valve timing
- G to A valve change: Use smooth valve coordination
The Trumpet's Unique Challenges
Valve Coordination: The Trumpet's Greatest Challenge
Trumpet valve coordination is notoriously difficult to master. The instrument's three-valve system creates distinct valve combinations that require specialized techniques and constant practice.
- Valve Timing: Each valve must be pressed at the exact right moment
- Valve Pressure: Different valves require different pressure
- Valve Combinations: Multiple valves must be coordinated
- Intonation Control: Valve combinations can cause intonation problems
- Tone Quality: Each valve combination has distinct tonal characteristics
Embouchure: The Trumpet's Most Demanding Requirement
The trumpet requires an embouchure that's completely different from other brass instruments. The conical bore and three-valve system require specific lip and jaw positioning for optimal tone production.
- Lip Position: Must control the air stream precisely
- Jaw Position: Jaw must be positioned correctly for optimal tone
- Constant Adjustment: Embouchure must be constantly fine-tuned
- Register Changes: Each register requires different embouchure adjustments
- Valve Combinations: Different valve combinations require different embouchure adjustments
Breath Support Requirements
Trumpet playing requires exceptional breath control due to the instrument's conical bore and three-valve system:
- Consistent Air Stream: Steady air flow needed for all registers
- Controlled Pressure: Avoid overblowing which causes sharpness
- Valve Transitions: Smooth air support during valve changes
- Dynamic Control: Precise control over volume and intensity
Developing Your First Notes
Before tackling complex fingerings, establish reliable sound production with these fundamental steps:
- Air-only starts: Buzz-free, flowing air; then add a light tongue release. Aim to match the same dynamic and pitch center on repeated attacks.
- Open notes: Begin with low C and G using relaxed air and centered embouchure. Sustain until tone color, pitch, and volume are steady for 6–8 seconds.
- Valve steps: Add 1, 1–2, 2–3, and 1–3 combinations to explore the lower notes. Keep finger motion small and vertical to maintain clarity.
Trumpet-Specific Practice Strategies
Effective practice requires structured routines that build skills progressively. Here's a comprehensive approach that addresses all aspects of trumpet playing.
Essential Daily Warm-up Routine (20–30 minutes)
- Breathing + Air Release (1–2 min): 3 in / 4 out; 1‑count air attacks on mouthpiece, even starts.
- Long Tones (5 min): Open notes and valve steps with tuner and drone. Prioritize consistent tone color at pp–mf. Practice sustained notes in all registers, focusing on steady pitch and tone quality.
- Lip Slurs (4 min): Open and 1/1–2 sets at soft dynamics; jaw stable; air controls slot. Start with C–G–C (low to middle), keeping jaw/pressure steady, changing air speed only.
- Valve Coordination (5–10 min): Slow scales in C and G; focus on smooth finger motion. Add crescendo–diminuendo within one breath. Practice valve transitions with deliberate, quiet movements.
- Articulation Patterns (5 min): Slur 2–tongue 2; light single tonguing. Keep releases clean—no jaw motion. Practice 4 slur–4 tongue on C major, aiming for identical tone color between slur and tongue.
- Simple Melodies (5–10 min): Play at soft–medium dynamics for control. Shape phrases with breath direction rather than pressure.
Progressive Learning Methodology
- Block then integrate: Isolate one skill (tone, valves, articulation), then combine two in short phrases.
- Slow-first principle: Start at the slowest tempo that guarantees accuracy; increase by 4 bpm only after two flawless reps.
- Reps over minutes: Count successful repetitions (e.g., 6 perfect attacks) instead of time spent; quality drives progress.
- Alternating focus: Tone → valves → articulation → musical line; rotate every 3–5 minutes to avoid fatigue and tunnel vision.
- Feedback loop: Short recordings reveal pitch drift and release issues—fix the cause, then retest.
Memory Techniques
- Valve Patterns: Notice that valve combinations follow logical patterns
- Visual Association: Create mental images of valve positions
- Muscle Memory: Practice until valve combinations become automatic
- Progressive Learning: Master one register before moving to the next
Trumpet Common Fingering Mistakes and Solutions
Understanding common pitfalls helps you avoid developing bad habits. Here are the most frequent issues and their solutions:
| Symptom | Likely Cause | Actionable Fix |
|---|---|---|
| Airy/unstable tone | Aperture too large; weak air support | Narrow aperture slightly; pp long tones with drone |
| Pinched tone | Corners too tight; jaw/throat tension | Release jaw/throat and support with air. Recenter the aperture; think warm "oh" inside the mouth |
| Sharp on crescendos | Pressure increase; bell angle | Keep pressure constant; warm air concept; adjust angle |
| Inconsistent valve pressure | Some valves pressed harder than others | Practice with a mirror, ensuring all valves are pressed with equal pressure |
| Slow/Noisy valves | Excess oil; misaligned guides | Clean, re‑oil sparingly; verify guides and springs. Lift/press straight up–down with relaxed fingers |
| Heavy pinky pressure | Pinky gripping hook, causing tension | Keep pinky off the hook to avoid tension and pitch rise. Stabilize with the left hand |
| Notes split or miss | Incorrect air-tongue coordination | Air first, then light tongue; practice mouthpiece air releases, then add horn |
| Range stalls quickly | Overblowing; jaw clamping | Short high‑note sets; faster air, not harder pressure |
Intonation Checklist by Valve Combinations
- Open: Centered at pp–mf; verify pitch with drone at both dynamics
- Valve 1 / 1–2: Slightly low—increase air core; avoid jaw bite; minute first‑slide adjustment later
- Valve 1–3: Often sharp—lighten pressure; confirm after dynamic changes
- Valve 2–3: Stuffy—steady air, relaxed tongue; prioritize resonance over volume
Technology and Modern Learning Tools
Modern technology offers excellent resources for learning trumpet fingerings:
Interactive Trumpet Fingering Charts
- Visual demonstration of each fingering
- Audio examples for each note
- Progressive difficulty levels
- Real-time feedback on accuracy
Mobile Apps and Software
- Metronome apps for timing practice
- Tuning apps for intonation work
- Recording software for self-assessment
- Virtual trumpet simulators
Understanding Trumpet Registers and Range
Work steadily from a comfortable middle range. Use a tuner and drone to build a stable center. Each register has distinct characteristics and requirements:
| Register | Typical Notes | Focus | Common Issues |
|---|---|---|---|
| Low | Low F♯–C | Warm air, relaxed tongue | Flat pitch, airy tone |
| Middle | G–E | Core sound, valve accuracy | Uneven articulation |
| Upper | F–high C | Air speed, relaxed pressure | Sharp pitch, fatigue |
Building Speed and Accuracy
Developing reliable valve coordination requires systematic practice that builds both speed and precision.
Progressive Speed Training
- Start Slow: Begin at 60 BPM, ensuring perfect accuracy
- Gradual Increase: Add 4–5 BPM only after two flawless repetitions
- Maintain Quality: Never sacrifice accuracy for speed
- Record Progress: Track your improvement over time
Accuracy Drills
- Random Note Practice: Have someone call out random notes
- Pattern Recognition: Practice common valve sequences
- Blind Practice: Play without looking at your valves
- Mirror Practice: Watch your valve movements for consistency
- Valve Accuracy Drills: Practice with dotted rhythms (long–short/short–long) in C and G major
Trumpet Maintenance and Care
Proper maintenance ensures your instrument responds reliably and your fingerings execute cleanly. Regular care prevents mechanical issues that interfere with valve coordination.
- Valves: Wipe then oil sparingly; confirm guides/springs are seated to prevent drag. Clean valves regularly to maintain smooth operation.
- Slides: Light grease on main/valve slides; ensure free travel for micro‑intonation adjustments.
- Moisture: Empty water keys often; wet leadpipe destabilizes response and pitch.
- Cleaning: Periodic lukewarm bath + mild soap; snake brushes; dry fully before oil/grease.
- Storage: Avoid heat/humidity extremes; protect bell rim and valve alignment.
Learning Path and Setting Realistic Expectations
Understanding the progression helps you set appropriate goals and maintain motivation:
- Weeks 1–2: Stable open notes, basic valve sets, clean soft attacks. Focus on posture, embouchure, and first valve combinations.
- Weeks 3–4: One‑octave scales with even time, simple melodies with planned breaths. Introduce more valve combinations.
- Weeks 5–8: Lip‑slur sets in two valve groups, dynamic shaping without pitch drift. Expand range gradually.
- Months 3–6: Two-octave scales, more complex articulation patterns, improved intonation control.
- Beyond: Gradual range extension with strict tone criteria; endurance grows from consistent, low‑tension practice.
Music Theory Basics for Trumpet Players
Understanding basic music theory enhances your ability to read music and execute fingerings accurately:
- Transposition: B♭ instrument—map concert↔written pitch with drone call‑and‑response. Written C sounds as B♭ on piano.
- Keys/Scales: C, G, F, D, B♭ majors + relative minors; tonic/dominant pedals for ear anchoring.
- Rhythm Literacy: Dotted/syncopated figures—subdivide with syllables; alternate click‑on/off.
- Articulation Notation: Distinguish staccatissimo/staccato/portato; match air length.
Mastering the Trumpet's Unique Demands
Trumpet playing requires a specialized approach to embouchure, breath support, and valve technique. The trumpet's conical bore, three-valve system, and harmonic series create unique challenges that must be mastered through dedicated practice.
Success on the trumpet requires developing a specialized skill set that includes precise embouchure control, exceptional breath support, and accurate valve coordination. These skills take years to develop and require constant maintenance through regular practice.
Remember that the trumpet is a unique instrument with its own distinctive challenges and rewards. Approach it with respect for its demands, and you'll discover the joy of mastering one of music's most versatile instruments. Each practice session builds upon the last, gradually developing the muscle memory, ear training, and technical facility needed for confident performance.
Next Steps in Your Trumpet Journey
As you progress, continue expanding your skills:
- Expand scales (major/minor) toward 2 octaves as comfortable; integrate articulation patterns.
- Build ensemble literacy: blend, balance, unified attacks/releases with section leaders.
- Explore advanced techniques: double tonguing, lip trills, and extended range work.
- Study repertoire appropriate to your level, focusing on musical expression alongside technical accuracy.