Ukulele Fingering Chart
Interactive first‑position mapping • treble‑clef reading • technique & PDF
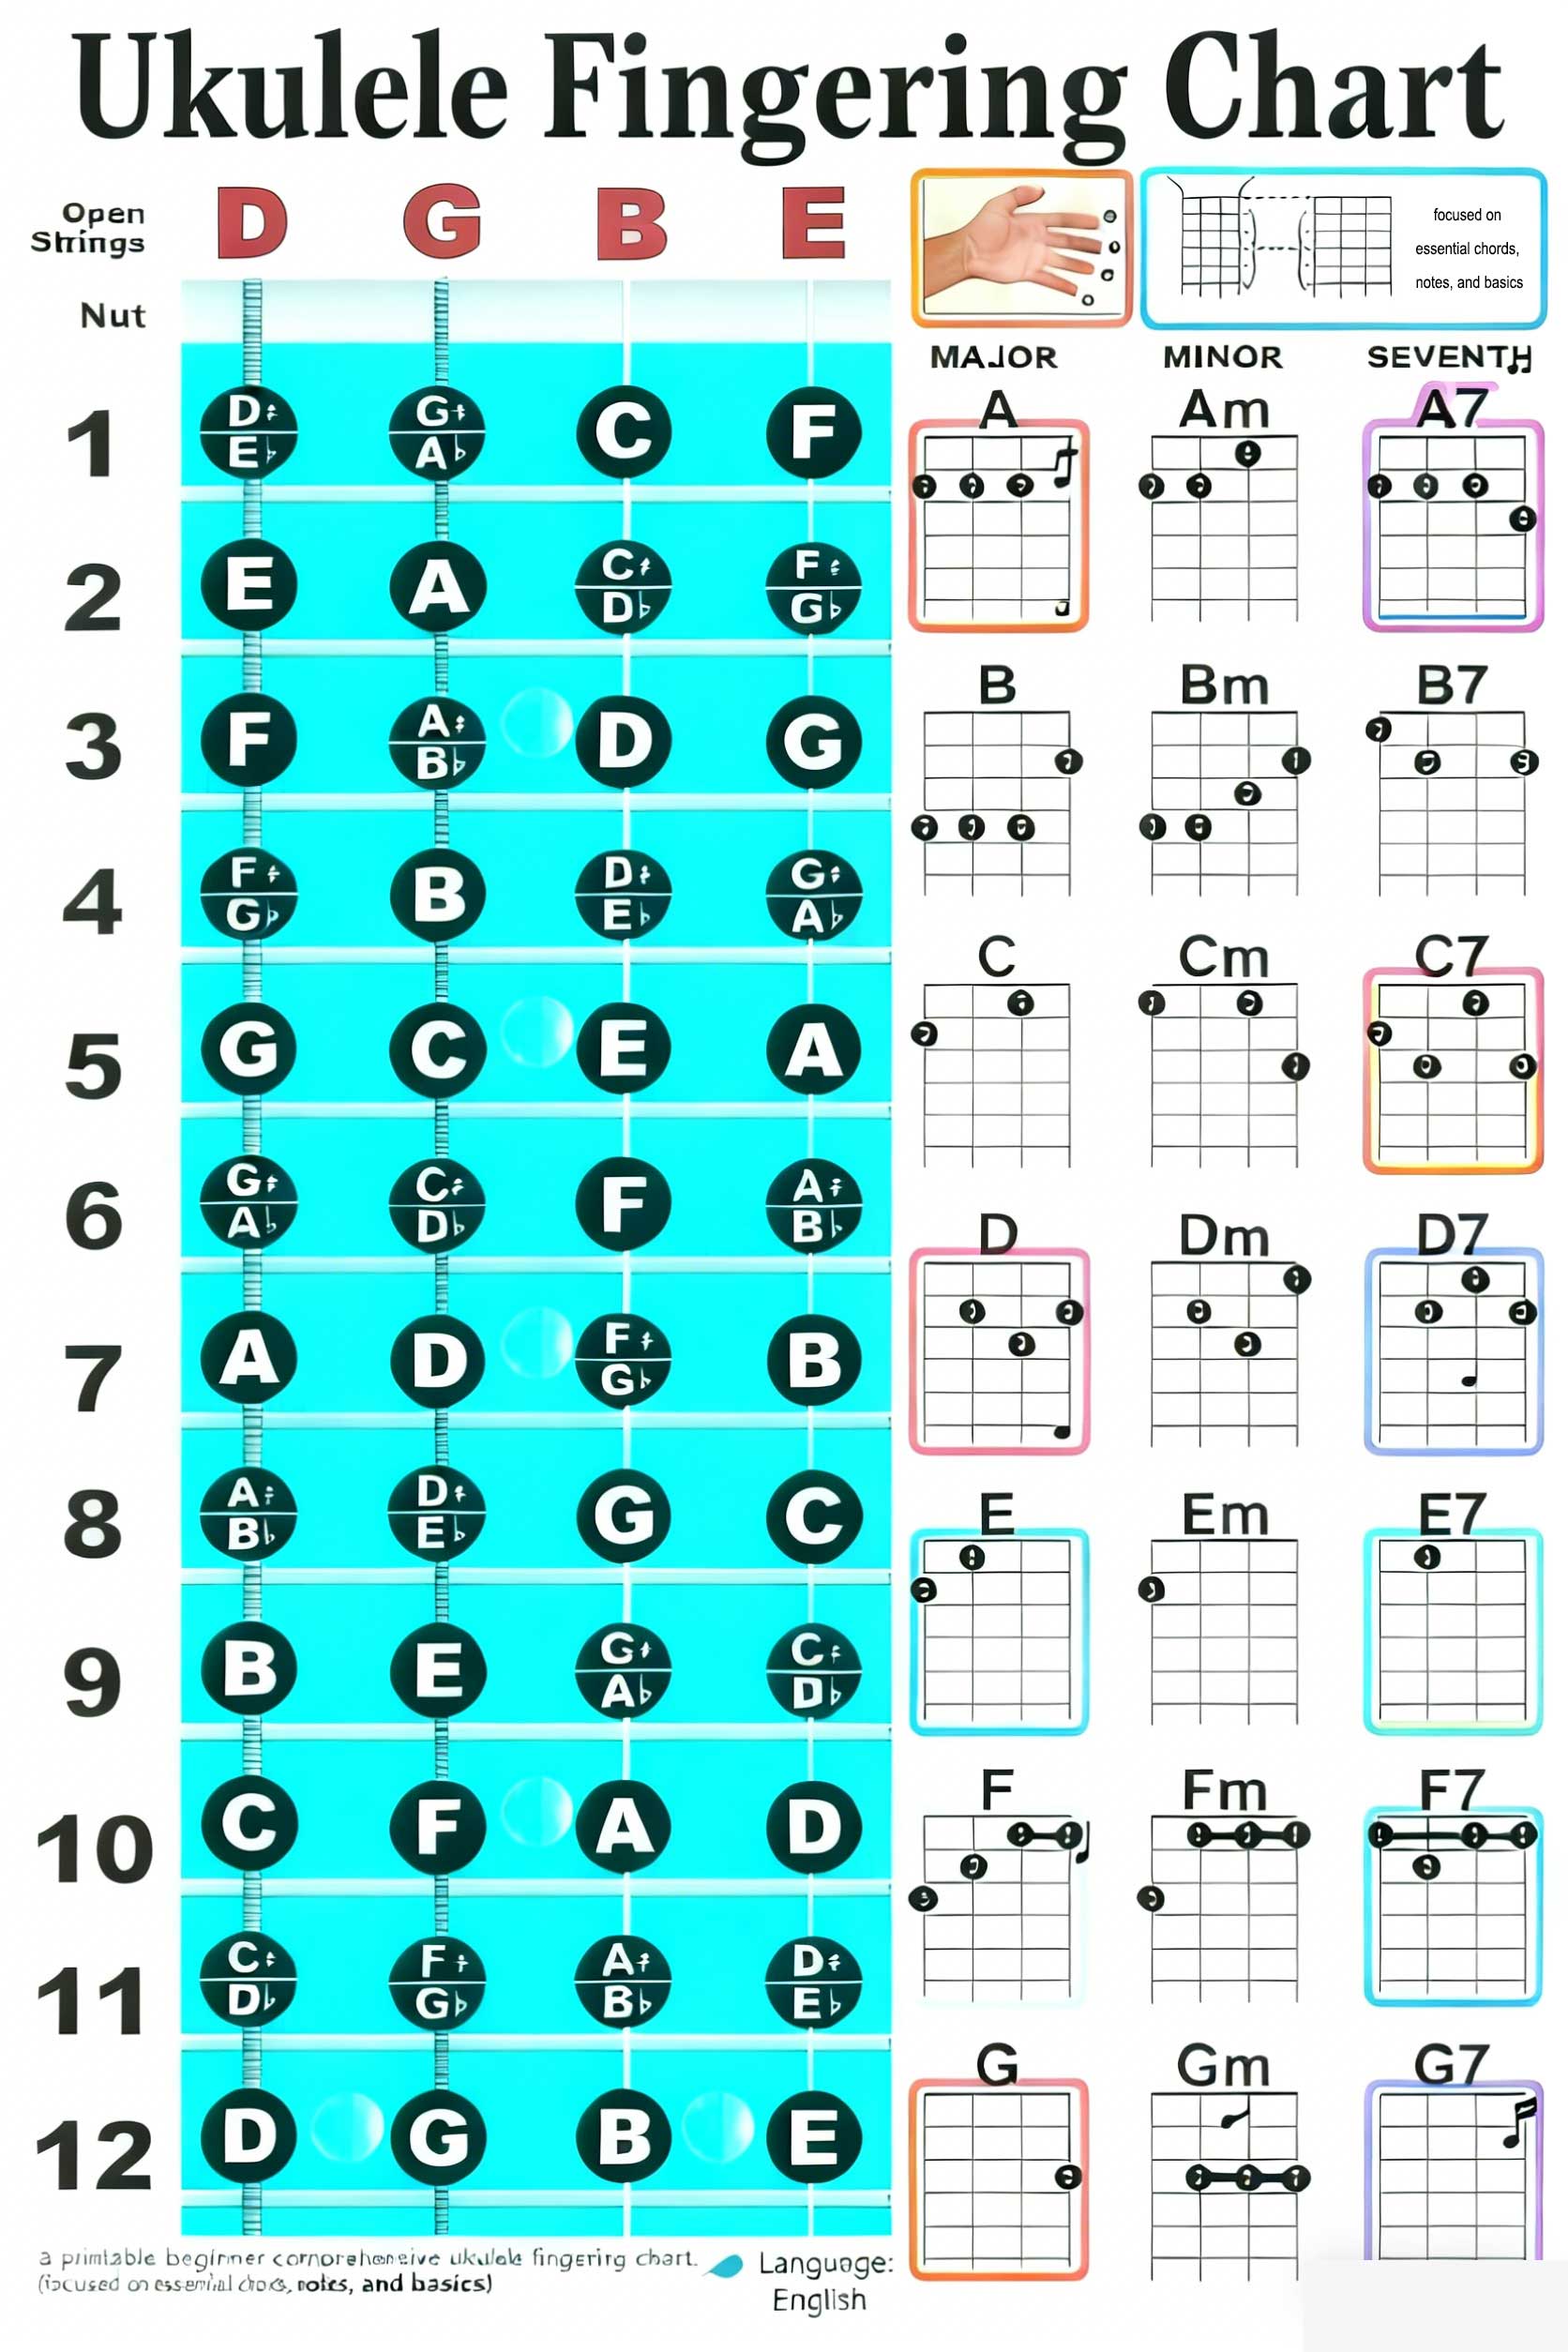
Interactive Ukulele Fingering Chart
🛠️ How to Use This Chart
Step 1: Set Key Signature
Sharps and flats influence open‑string usage and finger spacing patterns.
Step 2: Select a Written Note
See suggested string and fret (0=open; 1–3 typical in first position) with treble‑clef display.
Step 3: Choose Efficient Options
Pick the option that fits position, timbre, and shift plan; check intonation with a tuner.
Select a Note (First Position)
Ukulele Fingering Chart Image
High‑contrast PDF for lessons and practice. Go to Download Page or open PDF directly: Open PDF
Understanding Ukulele Fingerings
Musical notes are organized in a specific pattern. Understanding this pattern is crucial for reading music and learning fingerings.
Want a deeper primer? Read our Music Notes Guide for beginners.
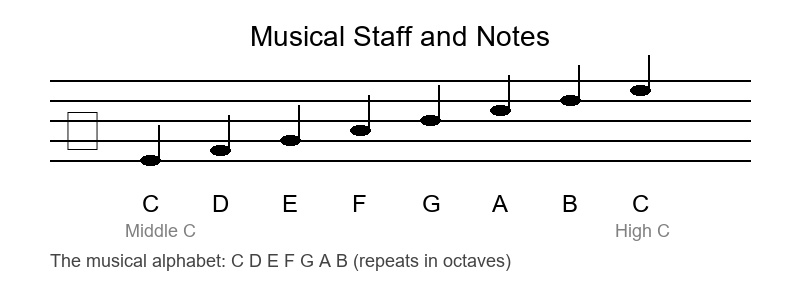
The Musical Alphabet:
Musical notes use the letters A, B, C, D, E, F, G, then repeat. In ukulele music, middle C is written as C4.
- Natural Notes: C, D, E, F, G, A, B
- Sharp (♯): Raises a note by one half step (e.g., C♯)
- Flat (♭): Lowers a note by one half step (e.g., B♭)
Note: Ukulele uses re-entrant tuning where the G4 string is tuned higher than C4, creating a unique timbre.
Half Steps and Whole Steps
Understanding the distance between notes is essential for learning scales and fingering patterns.
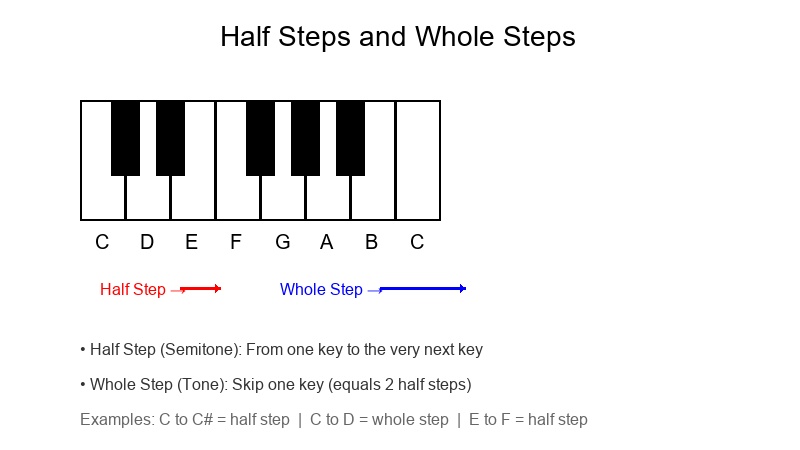
Half Step (Semitone):
The smallest distance between two notes. On a ukulele, it's one fret apart.
Examples:
- C to C♯ (or D♭) - one fret up
- E to F - one fret up
- B to C - one fret up
Whole Step (Tone):
Equal to two half steps. Skip one fret on the ukulele.
Examples:
- C to D (2 frets apart)
- F to G (2 frets apart)
- A to B (2 frets apart)
Ukulele Octaves and Pitch Ranges
An octave is the interval between one note and another with the same letter name but different pitch. The ukulele typically covers about 2-3 octaves depending on size and technique.

Ukulele Range:
- Low Register: G4 to C5 (open strings and first position)
- Middle Register: C5 to A5 (frets 0-5, most comfortable for beginners)
- High Register: A5 to C6 and above (requires advanced fingerpicking and higher fret work)
Octave Example: C4 (C string open) to C5 (A string 3rd fret) is one octave. Same note name, different pitch level.
Understanding the Ukulele
Standard Tuning and First Position
- Open strings: G4 (re‑entrant), C4, E4, A4.
- Fingers: 1=index, 2=middle, 3=ring, 4=pinky; 0=open.
- First position: Frets 1–3/4; leverage open strings for resonance when musical.
Left‑Hand and Intonation
- Thumb relaxed behind neck; fingers near frets; minimal pressure to avoid sharping.
- Use drones/tuners; compare octaves/unisons across strings for pitch checks.
- Economy of motion: prepare fingerings early; avoid collapsing knuckles.
Right‑Hand Basics
- Strumming: even wrist motion; consistent attack across strings; control dynamics.
- Fingerpicking: alternate i‑m‑a patterns; keep tone consistent; manage string noise.
- Contact point: nearer bridge = brighter; nearer fretboard = warmer。
Common First‑Position Fingerings
| Written Note | String | Fret | Tip |
|---|---|---|---|
| C4 | C4 | 0 | Home reference; tune resonance |
| E4 | E4 | 0 | Compare against A4 string for intervals |
| F4 | E4 | 1 | Place near fret to minimize buzz |
| G4 | G4 | 0 | Re‑entrant string; timbre differs from A4 3rd fret |
Shifting Basics
- Shift during longer values or rests; guide finger lightly; land with shape ready.
- Slow practice with a drone and metronome; increase tempo while maintaining tone.
How to Hold the Ukulele Correctly
Right arm: rest the lower bout on your right forearm or leg, with elbow providing support. Left hand: thumb behind the neck near the middle, fingers curved over the fretboard, fingertips pressing strings near frets. Keep the instrument angled slightly toward you for better visibility. The neck should point upward at about a 45-degree angle.

How to Learn to Play the Ukulele
- Start with basic chords: establish proper hand position and finger placement, focus on open chords (C, G, Am, F).
- Practice strumming patterns: use down and up strokes to develop rhythm, start with simple 4/4 patterns.
- Learn chord transitions: practice moving between common chords smoothly without stopping.
- Keep fingering chart handy: reference during lessons and practice to avoid developing bad habits.
- Practice simple songs: like "Somewhere Over the Rainbow" and "I'm Yours" to improve musical flow.
- Expand techniques: gradually explore fingerpicking, barre chords, and different strumming patterns.
- Use interactive tools: utilize this page's interactive chart or other fretboard simulators for practice.