
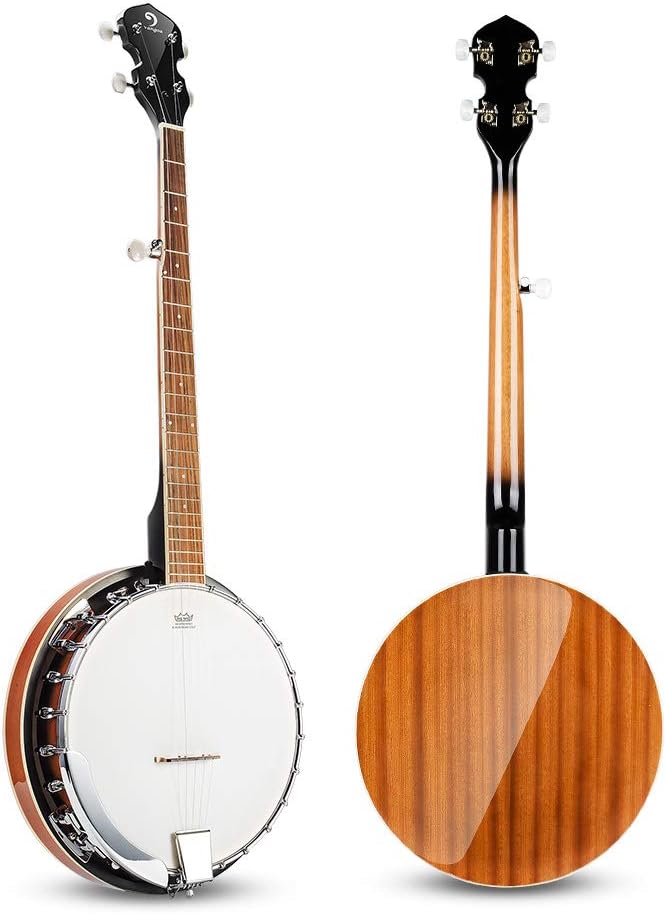
Whether you picked up a 5-string banjo last week or you've been plucking a few notes here and there, a banjo chord chart is the most practical tool you can keep within arm's reach. This guide covers everything a new player actually needs: how chord diagrams work, the open G tuning reference, the easiest first chords, how the I–IV–V progression fits together, a few right-hand patterns worth knowing, and a free printable PDF you can pin to your music stand.
Work through it in order, and you'll be able to read any banjo chord chart you see — in a songbook, on a lesson video, or in this article — and actually play the chords behind dozens of folk, country, and bluegrass songs.
1. What Is a Banjo Chord Chart?
A banjo chord chart (also called a banjo chord diagram or banjo chord box) is a bird's-eye view of the banjo's neck, looking down from the player's side. Each chart shows you exactly where to put your fingers to play a specific chord. The good news: you don't need to read sheet music to use one.
Every chord chart you'll ever meet is built from the same ingredients: a grid of strings and frets, a few dots, and a tiny legend. Once you understand those ingredients, you can decode any chart in any songbook.
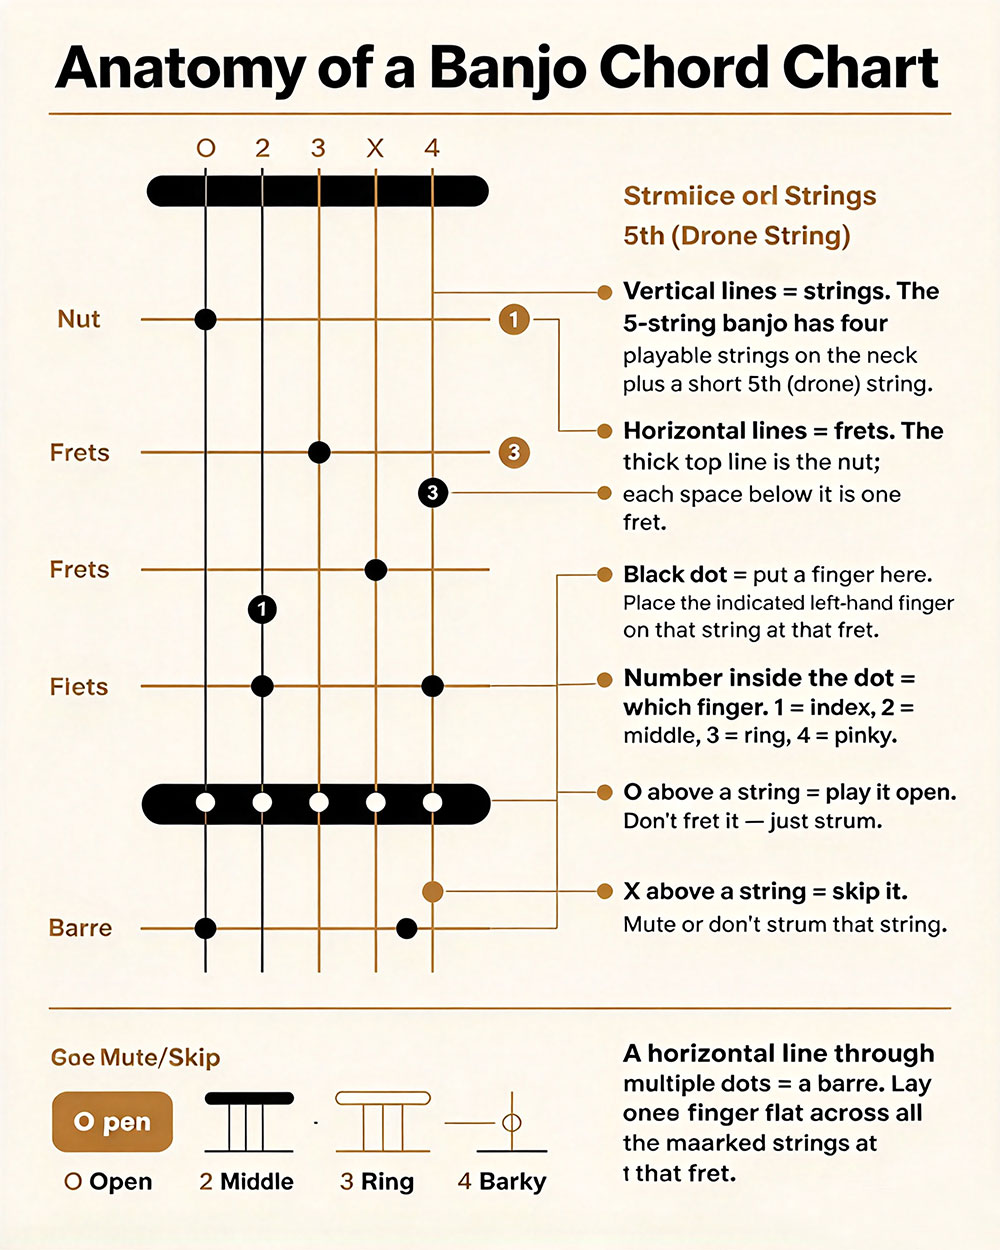
Anatomy of a Banjo Chord Chart
- Vertical lines = strings. The 5-string banjo has four playable strings on the neck plus a short 5th (drone) string. Most charts show all five; the drone is usually set apart from the others.
- Horizontal lines = frets. The thick top line is the nut; each space below it is one fret.
- Black dot = "put a finger here". Press the indicated left-hand finger on that string at that fret.
- Number inside the dot = which finger. 1 = index, 2 = middle, 3 = ring, 4 = pinky.
- "O" above a string = play it open. Don't press anything — just strum or pluck.
- "X" above a string = skip it. Mute it or don't play it.
- A horizontal line through multiple dots = a barre. Lay one finger flat across all the marked strings at that fret.
2. Strings on a Standard 5-String Banjo
Before you read another chord, learn the string names. The 5-string banjo in open G tuning is tuned (low to high playable string):
| Number | Pitch | Role |
|---|---|---|
| 4th string | D3 | Lowest playable string |
| 3rd string | G3 | Middle |
| 2nd string | B3 | Middle |
| 1st string | D4 | Highest playable |
| 5th string (drone) | G4 | Short string, pegged at 5th fret |
You'll often see this written as gDGBD (low to high), with the lower-case g reminding you that the 5th string sits higher than the 4th string — that's the defining feature of a 5-string banjo.
3. Why "G Tuning" for the Banjo?
The vast majority of bluegrass, folk, and old-time banjo is played in open G tuning. There are good reasons for that:
- Open strings form a G chord. Strum all four long strings without fretting anything and you get a full, ringing G major chord.
- Simple shapes sound big. Even a one-finger chord like A7 has rich overtones because of the open drone.
- Thousands of songs fit. "Cripple Creek", "Man of Constant Sorrow", "Wagon Wheel", "Nine Pound Hammer" — all in G.
- Capo-friendly. A capo on the 2nd fret turns the I-IV-V into A-D-E without new fingerings.
That's why most "chord chart for banjo in G tuning" searches land on the same shapes. The key of G is the banjo's home key.
🎸 Related String Instruments
Looking for a four-string sibling? See our Ukulele Fingering Chart and Guitar Fingering Chart for other fretted chord references.
4. Banjo Chords for Beginners — Where to Start
Don't try to learn 30 chord shapes at once. The most useful banjo chords for beginners are the same chords you find in thousands of folk and country songs. Work through them in this order:
- G — your starting point. The open 5th-string drone rings behind every G chord, which is why this tuning is called open G.
- C — a simple two-finger shape. The IV chord of G.
- D7 — the turnaround chord. Lift and replace one finger; classic bluegrass.
- Em — minor colour; works with G, C, and D7 for emotional songs.
- A7 — a one-finger chord, the V7 of D. Lifts many songs to life.
Practice switching between them slowly with a metronome. Aim for clean, ringing chord changes before adding the right-hand picking pattern.
Why these chords first?
They form the I-IV-V progression (G-C-D) — the most common chord sequence in folk, bluegrass, and country music. They also share similar hand positions, so once you can switch G → C smoothly, D and D7 fall into place with only small finger adjustments. Master those three changes first, then expand.
5. The 12 Essential Chords (Major, Minor, 7th)
Print or bookmark this section — it's the whole chord vocabulary you need to start playing real songs. Read across each row: 4-3-2-1 are the playable strings (low to high), 5 is the drone. Numbers show the fret to press; "0" means open; "X" means skip.
5-String Banjo Chord Chart — Major Chords
| Chord | 4 (D) | 3 (G) | 2 (B) | 1 (D) | Drone (g) | Tip |
|---|---|---|---|---|---|---|
| G | 0 | 0 | 0 | 0 | O | Play all open — no frets needed |
| C | 0 | 0 | 1 | 2 | O | Index on 2nd string fret 1, ring on 1st string fret 2; skip the 4th string |
| D | 0 | 2 | 2 | 4 | X | Index at 2nd fret of 3rd & 2nd strings; ring at 4th fret of 1st; mute 5th |
| A | 2 | 2 | 0 | 0 | X | Barre at 2nd fret across 4th and 3rd strings |
| F | 1 | 1 | 2 | 3 | X | Movable barre shape; slide up two frets from G shape for F |
Banjo Chord Chart — Minor and 7th Chords
| Chord | 4 (D) | 3 (G) | 2 (B) | 1 (D) | Drone (g) | Use it for |
|---|---|---|---|---|---|---|
| Em | 0 | 2 | 0 | 2 | O | Index at 2nd fret of 3rd string, ring at 2nd fret of 1st string |
| Am | X | 2 | 2 | 3 | O | Barre at 2nd fret across 3rd and 2nd; ring at 3rd fret of 1st |
| D7 | 0 | 0 | 1 | 4 | O | Like C but lift the ring finger one string and two frets higher |
| A7 | 2 | 0 | 0 | 0 | X | The famous one-finger "A7" |
| B7 | 2 | 2 | 0 | 2 | X | Drive the V chord in E or A key |
| G7 | 2 | 0 | 0 | 0 | O | Bluesy V7 turnaround in G |
| C7 | 0 | 1 | 0 | 1 | O | Index at 2nd string fret 1; ring at 1st string fret 2; same as C but play with the drone |
6. The I — IV — V Progression in G
If you learn only one chord progression on the banjo, learn the I-IV-V. In the key of G it goes G → C → D (and often ends with D7 for the classic bluegrass turnaround). Every folk, country, and bluegrass song you can think of leans on this three-chord backbone.
Try the cycle at 60 BPM. Strum once per chord, then add a basic forward roll. Within minutes you'll recognize the sound of countless songs.
7. Right-Hand Patterns to Layer on Top
Once your left hand knows the chord shapes, layer a right-hand pattern on top. The two most common patterns for chord-melody banjo are:
Forward Roll (Scruggs-style)
Pattern: Thumb – Index – Middle – Thumb (T-I-M-T). It feels like a slow "tic-tic-tic-tic" and outlines a melody line inside the chord. Use it on long sustained chords, especially in melodic banjo pieces.
Brush + Strum (Old-time / Frailing)
Pattern: Brush down across the strings with the back of your fingernails, then snap the chord on the beat. It's rhythmic, percussive, and drives dance tunes. Common in old-time, frailing, and clawhammer styles.
Try the forward roll over a slow G–C–D7–G cycle at 60 BPM and listen for the melody that emerges from inside the chord.
8. How to Hold the Banjo
Posture and banjo position matter because a relaxed body lets your fingers move freely.
- Banjo body: Rest the pot on your right thigh, or use a strap so the banjo hangs at the same angle whether you're sitting or standing. Neck should point up at roughly 45 degrees.
- Left hand: Thumb rests on the back of the neck, opposite your index finger. Fingers curve over the strings with a slight arch — not flattened.
- Right wrist: Keep it relaxed and straight, not bent. Your thumb, index, and middle fingers are your picking tools; tension in the wrist makes them sluggish.
- Shoulders: Let them drop. Many beginners hunch without noticing — a quick mirror check or video recording reveals a lot.
9. Common Beginner Mistakes (and Easy Fixes)
Mistake 1 — Buzzing or muted notes
Press closer to the fret (not on top of it). Use the tip of your finger, not the pad. The closer to the fret, the less pressure you need.
Mistake 2 — Muted 5th string drone
If your ring or pinky finger accidentally touches the 5th string, angle your hand slightly so it clears the drone. Many beginners don't even notice they're killing the drone until they record themselves.
Mistake 3 — Slow chord changes
Keep your index finger on the fretboard between chords instead of lifting all fingers completely. This "anchor" technique dramatically cuts change time. Practice one transition at a time — say, G→C — for 5 minutes straight, then move on.
Mistake 4 — Tense wrist and shoulders
Drop your shoulders, breathe, and let the pick glide. Tension makes every chord change twice as hard and shortens practice sessions.
Mistake 5 — Skipping chord theory
You can play hundreds of songs with just G, C, D, D7, Em, and A7 — but understanding why those chords work (because they form the I-IV-V in the key of G) unlocks every other key. Spend 10 minutes learning the major scale degrees before adding more chords.
10. A Simple Practice Plan for the First 30 Days
Consistent short sessions beat occasional long ones. This 20-minute daily plan takes you from knowing no chords to playing through simple songs in four weeks:
Week 1 — G, C, and switching
- 5 min: warm up with single-string plucking, then play the open G chord 8 times.
- 10 min: change between G and C, one strum per chord, with a metronome at 60 BPM.
- 5 min: try the forward roll over the G chord only.
Week 2 — Add D and D7
- 5 min: G–C warm-up.
- 10 min: G–C–D cycle, then G–C–D7 turnaround.
- 5 min: forward roll over the cycle.
Week 3 — Add Em and A7
- 5 min: G–C–D–D7 warm-up.
- 10 min: cycle through all 6 chords, 8 changes per chord.
- 5 min: try a song like "Cripple Creek" or "Wagon Wheel" slowly.
Week 4 — Put it all together
- 5 min: warm-up.
- 10 min: play a full song, no metronome — just chords and rhythm.
- 5 min: review your toughest transition (G→C? D7→G?) and drill it 20 times.
11. Beyond First Position
This chart focuses on first position (frets 0–4) because that's where most beginners live. As you grow you'll start to use:
- Barre chords at frets 3, 5, 7, and up the neck — every shape becomes movable, and you can play in any key.
- Capo positions — a capo on fret 2 turns the I-IV-V into A-D-E without new fingerings.
- Other tunings like Double C (gCGCD), G modal (gDGCD), and D tuning (f#DF#AD) for different sounds and songbooks.
- 3-finger picking rolls beyond the forward roll — including the backward roll, foggy mountain breakdown, and pinch.
12. Free Printable Banjo Chord Chart PDF
Want all of this on one printable page? We've prepared a free, color-coded PDF with the 12 essential chords, the I-IV-V in G, and a clear legend. It's optimized for A4 and Letter paper and prints without scaling.
📄 Download the Banjo Chords Chart PDF
One page, 14 chord shapes, ready to print and pin to your music stand.
Open PDF Free Download PDFHow to print it cleanly
- Click Open PDF to view it in your browser.
- Use File → Print and choose 100% scale (do not "shrink to fit").
- For best contrast on stage, print on matte white paper or laminate the page.
13. Frequently Asked Questions
Do I need to read sheet music to use a banjo chord chart?
No. Chord charts are visual — they show exactly where to put your fingers. You only need sheet music if you want to play a specific melody note-for-note.
Why is the 5th string drawn separately on some charts?
The drone string is shorter and fretted only in advanced techniques. For 95% of chord playing, it just rings open at G.
Is this chart the same as a mandolin chord chart?
Similar in layout, but a mandolin has 4 paired strings (8 strings in 4 courses) tuned G-D-A-E, so the fingerings differ. The reading principles (vertical = string, horizontal = fret, dot = finger) are the same.
How long does it take to learn the basic chords?
Most beginners get clean G, C, and D within two to three weeks of 20-minute daily practice. Add D7 in week three, and you'll be ready to play dozens of folk songs.
What if my fingers hurt?
Tip-of-finger soreness is normal for the first two weeks and goes away as you build calluses. If pain persists, lighten your pressure — banjo needs much less force than guitar.
14. Conclusion — Your First 5 Songs
You now have everything you need to read a banjo chord chart, hold the instrument, switch between G, C, D, D7, Em, and A7, and play a song in the key of G. To put it all into practice, learn five starter songs in this order:
- "Cripple Creek" — two chords (G, D7), classic single-string melody on top.
- "Man of Constant Sorrow" — G, C, and a pinch of Em.
- "Wagon Wheel" — G, D, Em, C — a perfect I-IV-V workout.
- "Nine Pound Hammer" — adds the A7 turnaround for energy.
- "You Are My Sunshine" — G, C, D7 with a slow, expressive roll.
Work through one chord at a time, one song at a time. Within a couple of months, those same chord charts won't look nearly as daunting as they did on day one.
Good luck — and enjoy the journey.